Summer Fruits Bread Pudding

A great summer recipe to satisfy your sweet tooth on a hot summer day!  The best way to ensure an absolutely perfect dessert is to use top of the line food prep machines.

Summer Fruits Bread Pudding
 
Author: 
Recipe type: Dessert
Prep time: 
Cook time: 
Total time: 
Ingredients
  • 1 loaf unsliced bread
  • 2 c. strawberries
  • 2 c. blackberries
  • 2 c. plums
  • 2 c. blueberries
  • ½ tsp cinnamon
  • ¼ - ½ c. sugar
  • 2 tbsp orange, raspberry, or almond liqueur (optional)
Instructions
  1. Preheat your oven to its lowest setting, no higher than 200°F.
  2. Slice your bread thickly. You can use white bread, challah, cinnamon bread, Hawaiian bread, brioche or any bread other than aggressively savory types such as sourdough, rye or whole wheat.
  3. Lay your bread slices out on a baking sheet. You may need more than one baking sheet. Place the bread in the oven & let it sit for 20 minutes. Turn the slices over & let the bread sit for another 20 minutes. This dries out the bread, allowing it to soak up the fruit juices without becoming soggy. You can also lay the bread out on sheets & let it sit on the counter overnight to air dry.
  4. While the bread is drying, wash all of your fruit & drain it well.
  5. Pull the tops off the strawberries. Slice the strawberries thickly.
  6. Slice the plums & discard the pits.
  7. Place the strawberries, plums & blueberries into a large saucepan. Add the orange, raspberry or almond liqueur for a richer dessert, if you like. Gently stir in the sugar & cinnamon. Heat the mixture to a simmer & let it cook for 5 minutes.
  8. Stir in the raspberries & remove the fruit from the heat.
  9. Cut the crusts off the bread.
  10. Line your casserole dish with cling wrap, making sure that at least 2″ overhangs the edge. You may need to lay one sheet across the width & one across the length.
  11. Press half of the ‘crustless’ bread slices into the bottom of the casserole dish. Arrange them with the edges overlapping so that they make a complete crust.
  12. Use a slotted spoon to scoop the fruit out of its bowl & into the casserole dish on top of the bread. Keep the leftover juices, because you’ll use them later.
  13. Arrange the other half of the bread loaf on top of the fruit. Press it down firmly.
  14. Cover the bread completely with cling wrap. Place a plate that fits just inside of the casseroles dish on top of the cling wrap. Weight it down with two or three small cans of soup or a large can of tomatoes. Refrigerate the pudding for 8 hours or overnight.
  15. Take the pudding out of the refrigerator & remove the cans and cling wrap. Turn the pudding out onto a serving plate & remove the cling wrap. Pour the reserved juices over the pudding & sprinkle just enough sugar on top to lightly coat it.
  16. Cut the pudding into wedges & serve it with whipped cream & fresh mint for a garnish.

Photo Courtesy of Susanne Nilsson

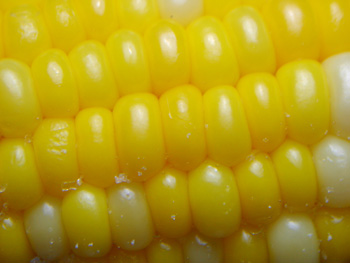
Debbie’s Corn Pudding

Debbie Says: This can also be prepared ahead of time and re-heated before service.

Debbie's Corn Pudding
 
Author: 
Recipe type: Side Dish
Ingredients
  • 2 cans creamed corn
  • 4 eggs, slightly beaten
  • 1 c. milk
  • ⅔ c. sugar
  • 6 tbsp flour
  • 2 tbsp butter
  • 2 tsp salt
  • ½ tsp nutmeg, ground
  • ½ tsp black pepper
Instructions
  1. Preheat oven to 350°F. Butter or spray 9"x9" baking dish (or other appropriate sized casserole dish).
  2. In a large bowl, mix together creamed corn, eggs, sugar, flour, salt, nutmeg, black pepper, & milk. Pour mixture into the prepared baking dish.
  3. Slice the butter in half & place the slices on top, separated. Bake for 1 hour or until golden brown on top. The center of the pudding may still appear to be loose due to the butter, but the edges should appear done.
  4. Server warm.

Photo Courtesy of Ishikawa Ken on Flickr

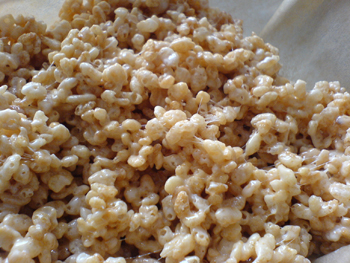
Debbie’s Sandy Candy

Debbie Says: You can use chunky or smooth peanut butter, whichever suits your liking more.  The topping is optional.  For variety you can use both flavors of chips or just use one or the other.  If using just one flavor, you’ll need to double the amount.

Debbie’s Sandy Candy
 
Author: 
Recipe type: Dessert
Ingredients
Main Candy
  • 1 c. light corn syrup
  • 1 c. granulated sugar
  • 6 c. Rice Krispies
  • 1 c. peanut butter
Toppings
  • 6 oz. chocolate chips
  • 6 oz. butterscotch chips
Instructions
  1. In a large pot, combine the corn syrup & sugar. Heat over moderate heat until bubbly.
  2. Remove from the heat. Add peanut butter & stir until melted & combined. Stir in Rice Krispies until well blended.
  3. Using the back side of a greased spoon, spread the mixture into a 9"x12" pan or dish.
  4. In a double boiler, heat the chocolate & butterscotch chips until melted completely. Remove from the heat & spread evenly over the Rice Krispie mixture, or drizzle in creative patterns.

Photo Courtesy of Karl Baron on Flickr

Create Summertime Memories with National S’mores Day on August 10

Hershey’s Milk Chocolate Celebrates by Partnering with TheMotherhood to Inspire Families to Share Special Moments with S’mores

National S’mores Day is August 10, and there is no better way to celebrate the occasion than with the delicious combination of purely delicious Hershey®‘s Milk Chocolate, crisp graham crackers and toasted, gooey marshmallows. This summer, Hershey’s Milk Chocolate has partnered with influential social media moms from TheMotherhood, an award-winning web community of 13,000 mothers, to provide sweet and easy tips for families to celebrate National S’mores Day and enjoy S’mores all season long.


Personalized Hershey's Bars at The Hershey's Store
“National S’mores Day is another great reason to gather family and friends to enjoy this classic summertime treat,” said Emily McKhann of TheMotherhood. “Combining Hershey’s Milk Chocolate, graham crackers and toasted marshmallows is the perfect way to sweeten any summer day and create lasting memories.”

Tips for Creating S’mores Smiles

S’mores have been a centerpiece of summertime since the recipe was first published in the Girl Scouts handbook in 1927. The classic treat is fun to make and offers families and friends an activity they can enjoy together. Below are some quick and easy tips for enjoying S’mores on National S’mores Day and everyday:

  1. Family Activity S’mores – Make S’mores a family activity by getting everyone involved. Little ones can be in charge of assembling the graham crackers and Hershey’s Milk Chocolate bars while adults and older children take care of roasting the marshmallows. Once your S’mores are ready, dig in and enjoy this tasty treat together.
  2. Grilled S’mores – For a fun new way to enjoy S’mores, try making them on the grill! Simply wrap S’mores in aluminum foil and place on a medium-hot grill and cook 1 to 2 minutes on each side. When you’re done you’ll have S’mores that are grilled to perfection.
  3. Party with S’mores –The next time you’re invited to a summer party, bring S’mores ingredients as your contribution to the gathering. Guests will love making gooey S’mores and you’ll be a hit at the party.
  4. Summer Vacation S’mores – S’mores aren’t only for camping! Many hotel chains offer fire pits or grilling areas which are perfect for making S’mores to help sweeten your trip and create a new family tradition. Staying home this summer? You can also build S’mores at the park or playground in the designated picnic or grilling area.

Say S’mores and Share Memories

This summer, families can showcase their favorite S’mores memories by visiting Hershey’s Facebook page at www.facebook.com/hersheys to download the Say S’mores application. Families are invited to participate in monthly themed photo contests for a chance to win S’mores-themed prizes, including a camera, photo printing gift card, outdoor fire pit, roasting skewers and all of the ingredients needed to make S’mores.

For more tips on creating S’more’s summertime memories or to participate in the Say S’mores photo contest and view official rules, please visit the Hershey’s brand Facebook page at www.facebook.com/hersheys.

SOURCE The Hershey Company

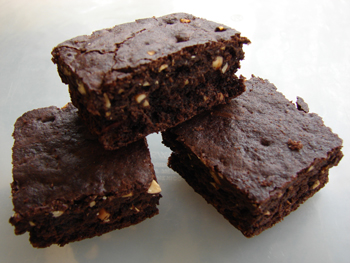
Jillian Michael Brownies

Carrie Says: These were modified slightly from the original recipe.

Jillian Michael Brownies
 
Author: 
Nutrition Information
  • Serves: 16
  • Serving size: 1
  • Calories: 82.8
  • Fat: 2.3 g
  • Carbohydrates: 16.2 g
  • Fiber: 1.2g
  • Protein: 1.3 g
Recipe type: Dessert
Prep time: 
Cook time: 
Total time: 
Ingredients
  • ⅔ c. mild honey
  • ⅓ c. unsweetened cocoa powder
  • ½ c. white whole wheat flour
  • ¼ tsp aluminum free baking powder
  • ¼ tsp baking soda
  • ¼ tsp salt
  • ½ c. unsweetened apple sauce
  • ¾ tsp pure vanilla extract
  • 2 tbsp olive oil
  • 1 large egg
Instructions
  1. Preheat oven to 350°F. Spray an 8" square pan with olive oil. Set aside.
  2. Place the honey in a large glass measuring cup. Microwave on high power until the honey is runny & just bubbling, 45 to 60 seconds. Add cocoa & stir with a fork until well combined. Let cool to room temperature.
  3. Meanwhile, in a small bowl, place the flour, baking powder, baking soda, & salt. Whisk until well combined.
  4. In a large bowl, combine the applesauce, oil, egg, & vanilla. Whisk together until well blended. Add honey, cocoa mixture & whisk until smooth. Add the flour mixture to the liquid mixture & stir until no traces of flour remain. Scrape the batter into the prepared pan.
  5. Bake until the surface looks dry around the edges of the pan & a toothpick inserted in the center comes out with moist crumbs clinging to it, about 25 minutes. Do not overbake. Place the pan on a cooling rack & let cool completely before slicing into 16 squares.
  6. Store the brownies in an airtight container at room temperature for up to 3 days.


Photo Courtesy of yum9me on Flickr